Tuesday, April 19, 2011

Most exciting thing so far: Slab concrete pour

The house slab was poured last Thursday. I was excited to see the process, and I definitely wanted to be around for it! Luckily they were already in full swing when I stopped by the lot before work that morning. When I drove up the street and saw the Cemex truck in the distance, I was a happy camper. 


That guy is using our wheelbarrow!


They started with the master bath


The mixture is a lot lumpier than I would have thought...


I think that guy was in charge


I had to head to work, but luckily Ken was able to swing by during lunch and take some more photos: 


After work we headed to the lot to check out the freshly poured slab. Surprisingly, it was set enough to walk on!

 View from northwest corner


That step down is for back porch


Ken, thinking about all the stuff he's going to fit in his garage


Standing in back porch


Standing in kitchen!


After the concrete was poured, that form board was pulled out. This is so rain doesn't end up in garage.


The concrete guys put these huge bolts in place after pouring the concrete. This is what will essentially hold the framing wood to the slab.


One of the cement trucks broke a hydraulic line and oil went everywhere. It looks pretty terrible. 


Since the slab was poured nearly a week ago, we have since begun framing. Hopefully I'll post on that tomorrow :)

Monday, April 18, 2011

Prior to slab pour...

Last Saturday we continued preparing for the slab pour. Now that the dirt was smoothed out and level, it was time to cover the entire area with Visqueen (super thick plastic...6mm to be exact!). This keeps the moisture in the dirt from seeping up into the slab. Next, we layed wire mesh over the plastic. This serves as reinforcement once the concrete is poured. 

It comes in these huge rolls. Once rolled out to desired length, it opens up to 16 ft wide. 


It kind of resembled a giant Slip n' Slide.


Can you see all the moisture already forming on the inside of the plastic?


Once it was all rolled out, we had to cut holes so it could fit over the plumbing. It all had to be sealed pretty tight, so we taped the plastic to stay in place.


Ian and me, carrying the wire mesh to the master bath.


This is what it looked like once it was all laid out. We tied together the joints with those metal twisty-tie things used for the rebar.


Garage shot


The mesh sits on top of these white plastic things called Mesh-ups. Clever, huh? This ensures the mesh is suspended in the concrete once it is poured.


See the rebar sticking up? All those needed to be grinded down until they came no higher than the block in which they were in.

Here is a video of me trying to avoid a burn...


The finished product:


After spending all of Saturday finishing this stuff up, we only needed one evening after work for some finishing touches for our last inspection before the slab pour!


Sunday, April 17, 2011

Update

1. I am behind on blogging
2. We've accomplished a lot in the past 10 days
3. Here is a quick run-down, in photos:


I'll be posting in-depth about the stuff we've done within the next few days...Thanks for staying tuned!

Sunday, April 10, 2011

Burying pipe & smoothing the dirt

Last Wednesday we were right on schedule with what needed to be done in preparation for the slab pour next week. 


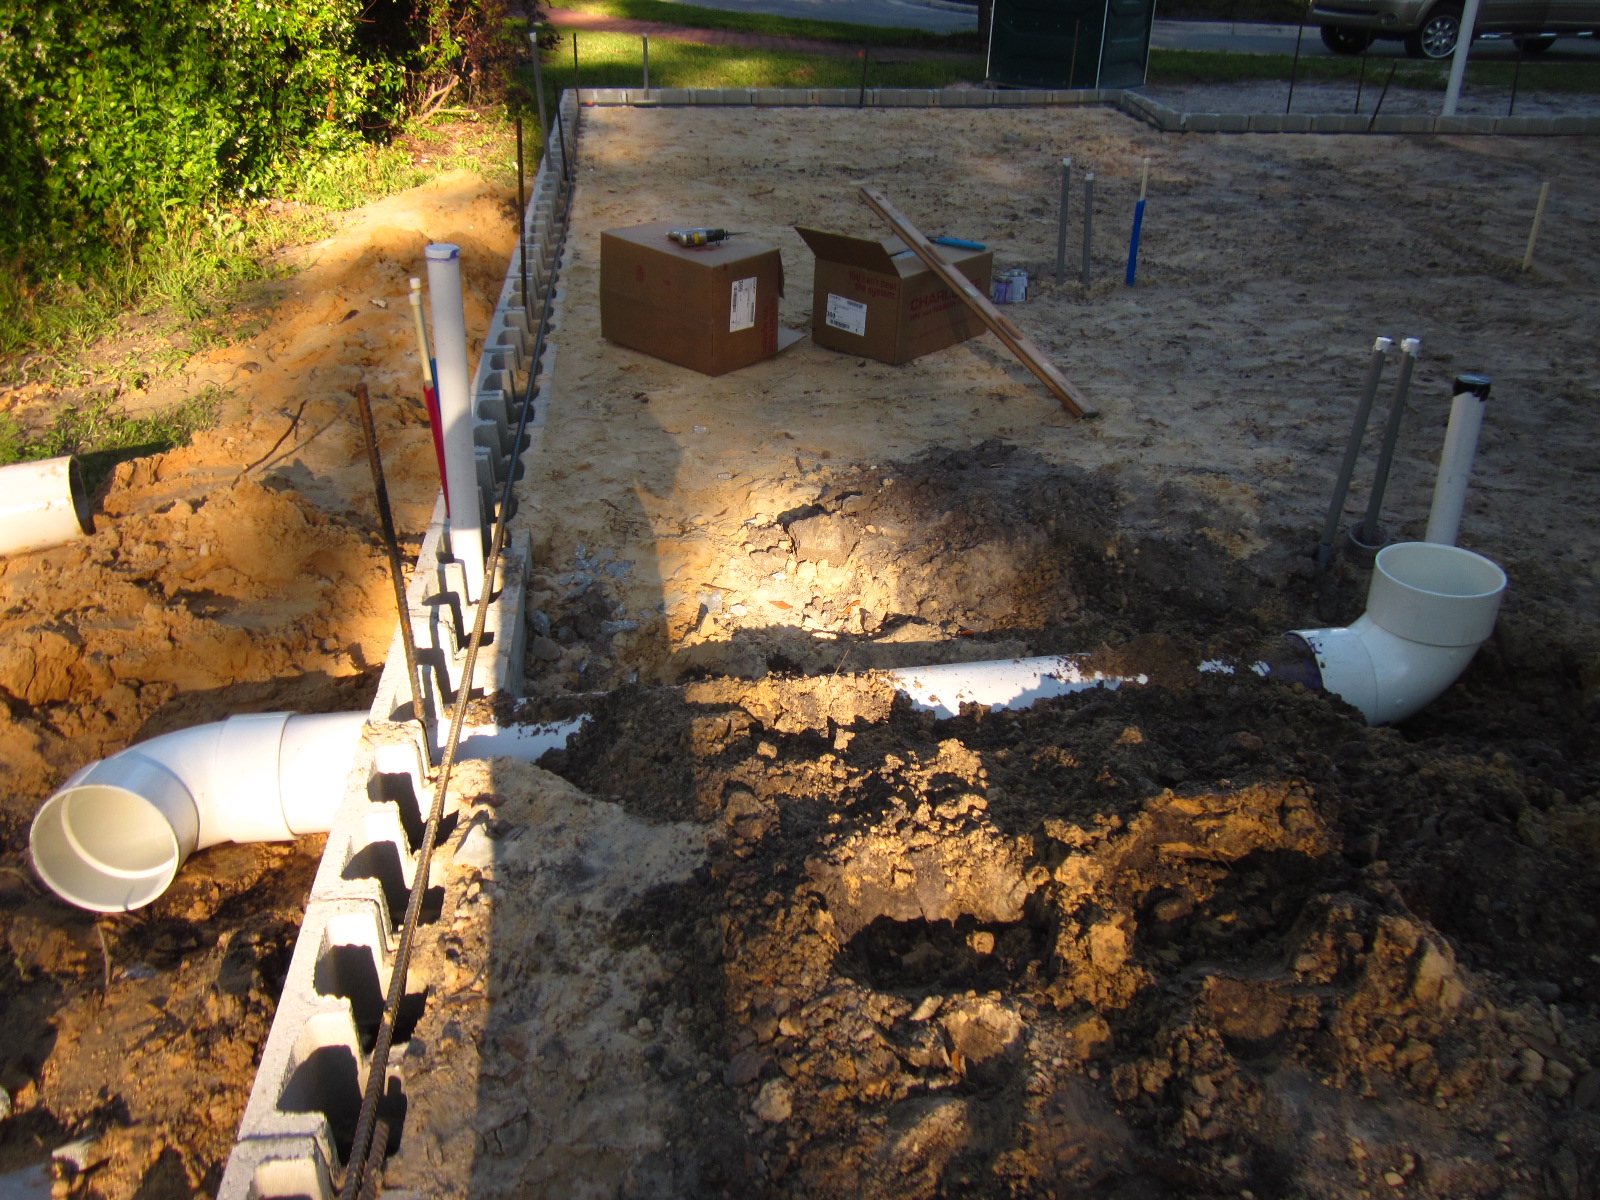
First, Ken traced a circle on the block that we would later remove in order to place the 8" PVC pipe


We used an air hammer to chip away at the block


He let me take a shot at it, and it was definitely one of the more fun things I've done so far!


That's what the hole looked like once I was finished. The dirt near the block then had to be shoveled away in order to make room to slide it in there.


Once the pipe was in place, we had to connect the fitting (that 90° piece) using PVC cement. The purple stuff above is used to clean both pieces before gluing together.


The finished product.

Once finished installing the pipe, it was time to smooth all the dirt. We ran a string across the dirt from chair block to chair block in 20ft segments and measured the distance from the dirt to these strings. (The dirt has to be at least 3.5" below the string since the concrete has to be at least this thick). If the dirt was less than 3.5" below, we had to shift dirt around to make it deeper. On the flip side, a distance much larger than 4.5" isn't favorable because that just equals more concrete to be poured (and paid for). 


This is what it looked like once we finished leveling the entire thing


Finishing up the garage (which Ken pays special attention to)


We worked on the lot yesterday (I'll hopefully post that stuff within the next couple days) and knocked out 90% of the stuff we aimed for (we ran out of material at the very end). The other 10% will be completed tomorrow in preparation for an inspection on Tuesday, followed by concrete pouring later this week. 

Wednesday, April 6, 2011

Few house updates

 Ken put in a lot of work this past weekend at the lot while I was away. He filled the trenches back up with dirt (which took 80% of his weekend), then dug out the back porch. 

Last week the A/C people laid the underground chase for the refrigerant lines throughout the house. (This went on the same time the plumbing did)

Tonight we laid rebar around the perimeter of the house. It gets laid directly on the chair block. Once the slab is poured in a week or so, all that steel creates a bond beam around the entire perimeter. It basically ties the entire slab together.


Ken, bending some steel

And here are 2 videos of me getting down with some steel bending: 


That pipe will be laid in the hole on the left tomorrow. That's where all the stove exhaust will end up for the cooktop stove on the island. Since we won't have a range hood, the pipe will serve as such.

Now that the plumbing has been installed, it is a lot easier to see where things in the house will be laid out.  I realized tonight that when standing at the island in the kitchen, you'll have a clear view of the living room TV! It is pretty exciting to get a better feel for where things will be.

Rest of the week: In order to prep for the slab pour, the next couple days will consist of installing that pipe and smoothing out all the dirt to ensure it's level throughout and 3.5-4" from the top of the chair block. On Friday morning, the dirt will be tested for compaction/density by a geological engineering company, followed by a termite treatment application (poisons the soil). If it passes the compaction test, 6mm plastic is laid over entire area, then covered with wire mesh. Finally, the slab is poured on top of all that!